Pink Champagne Layer Cake for Every Celebration
This post may contain affiliate links that won’t change your price but will share some commission.

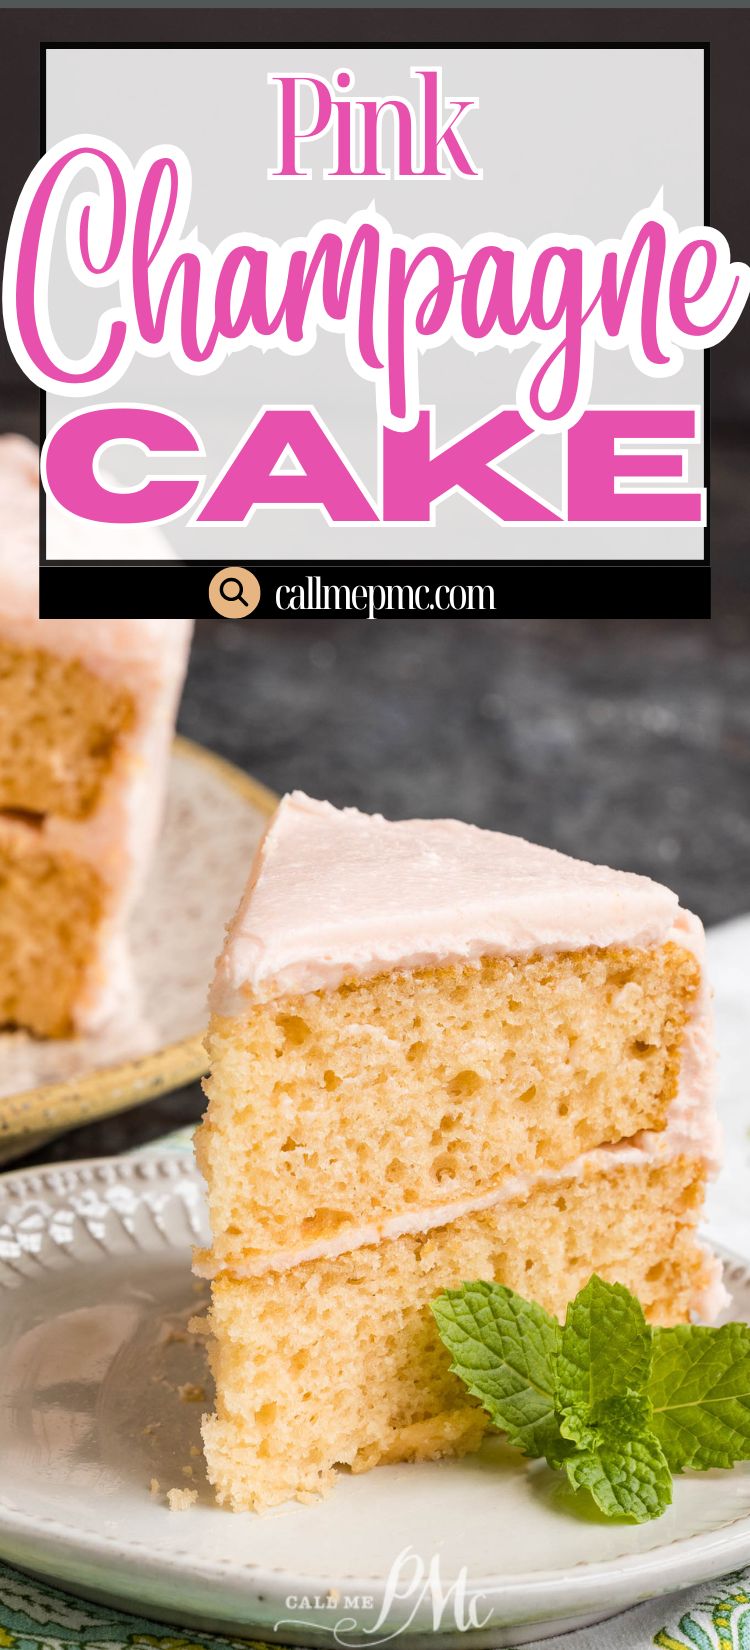
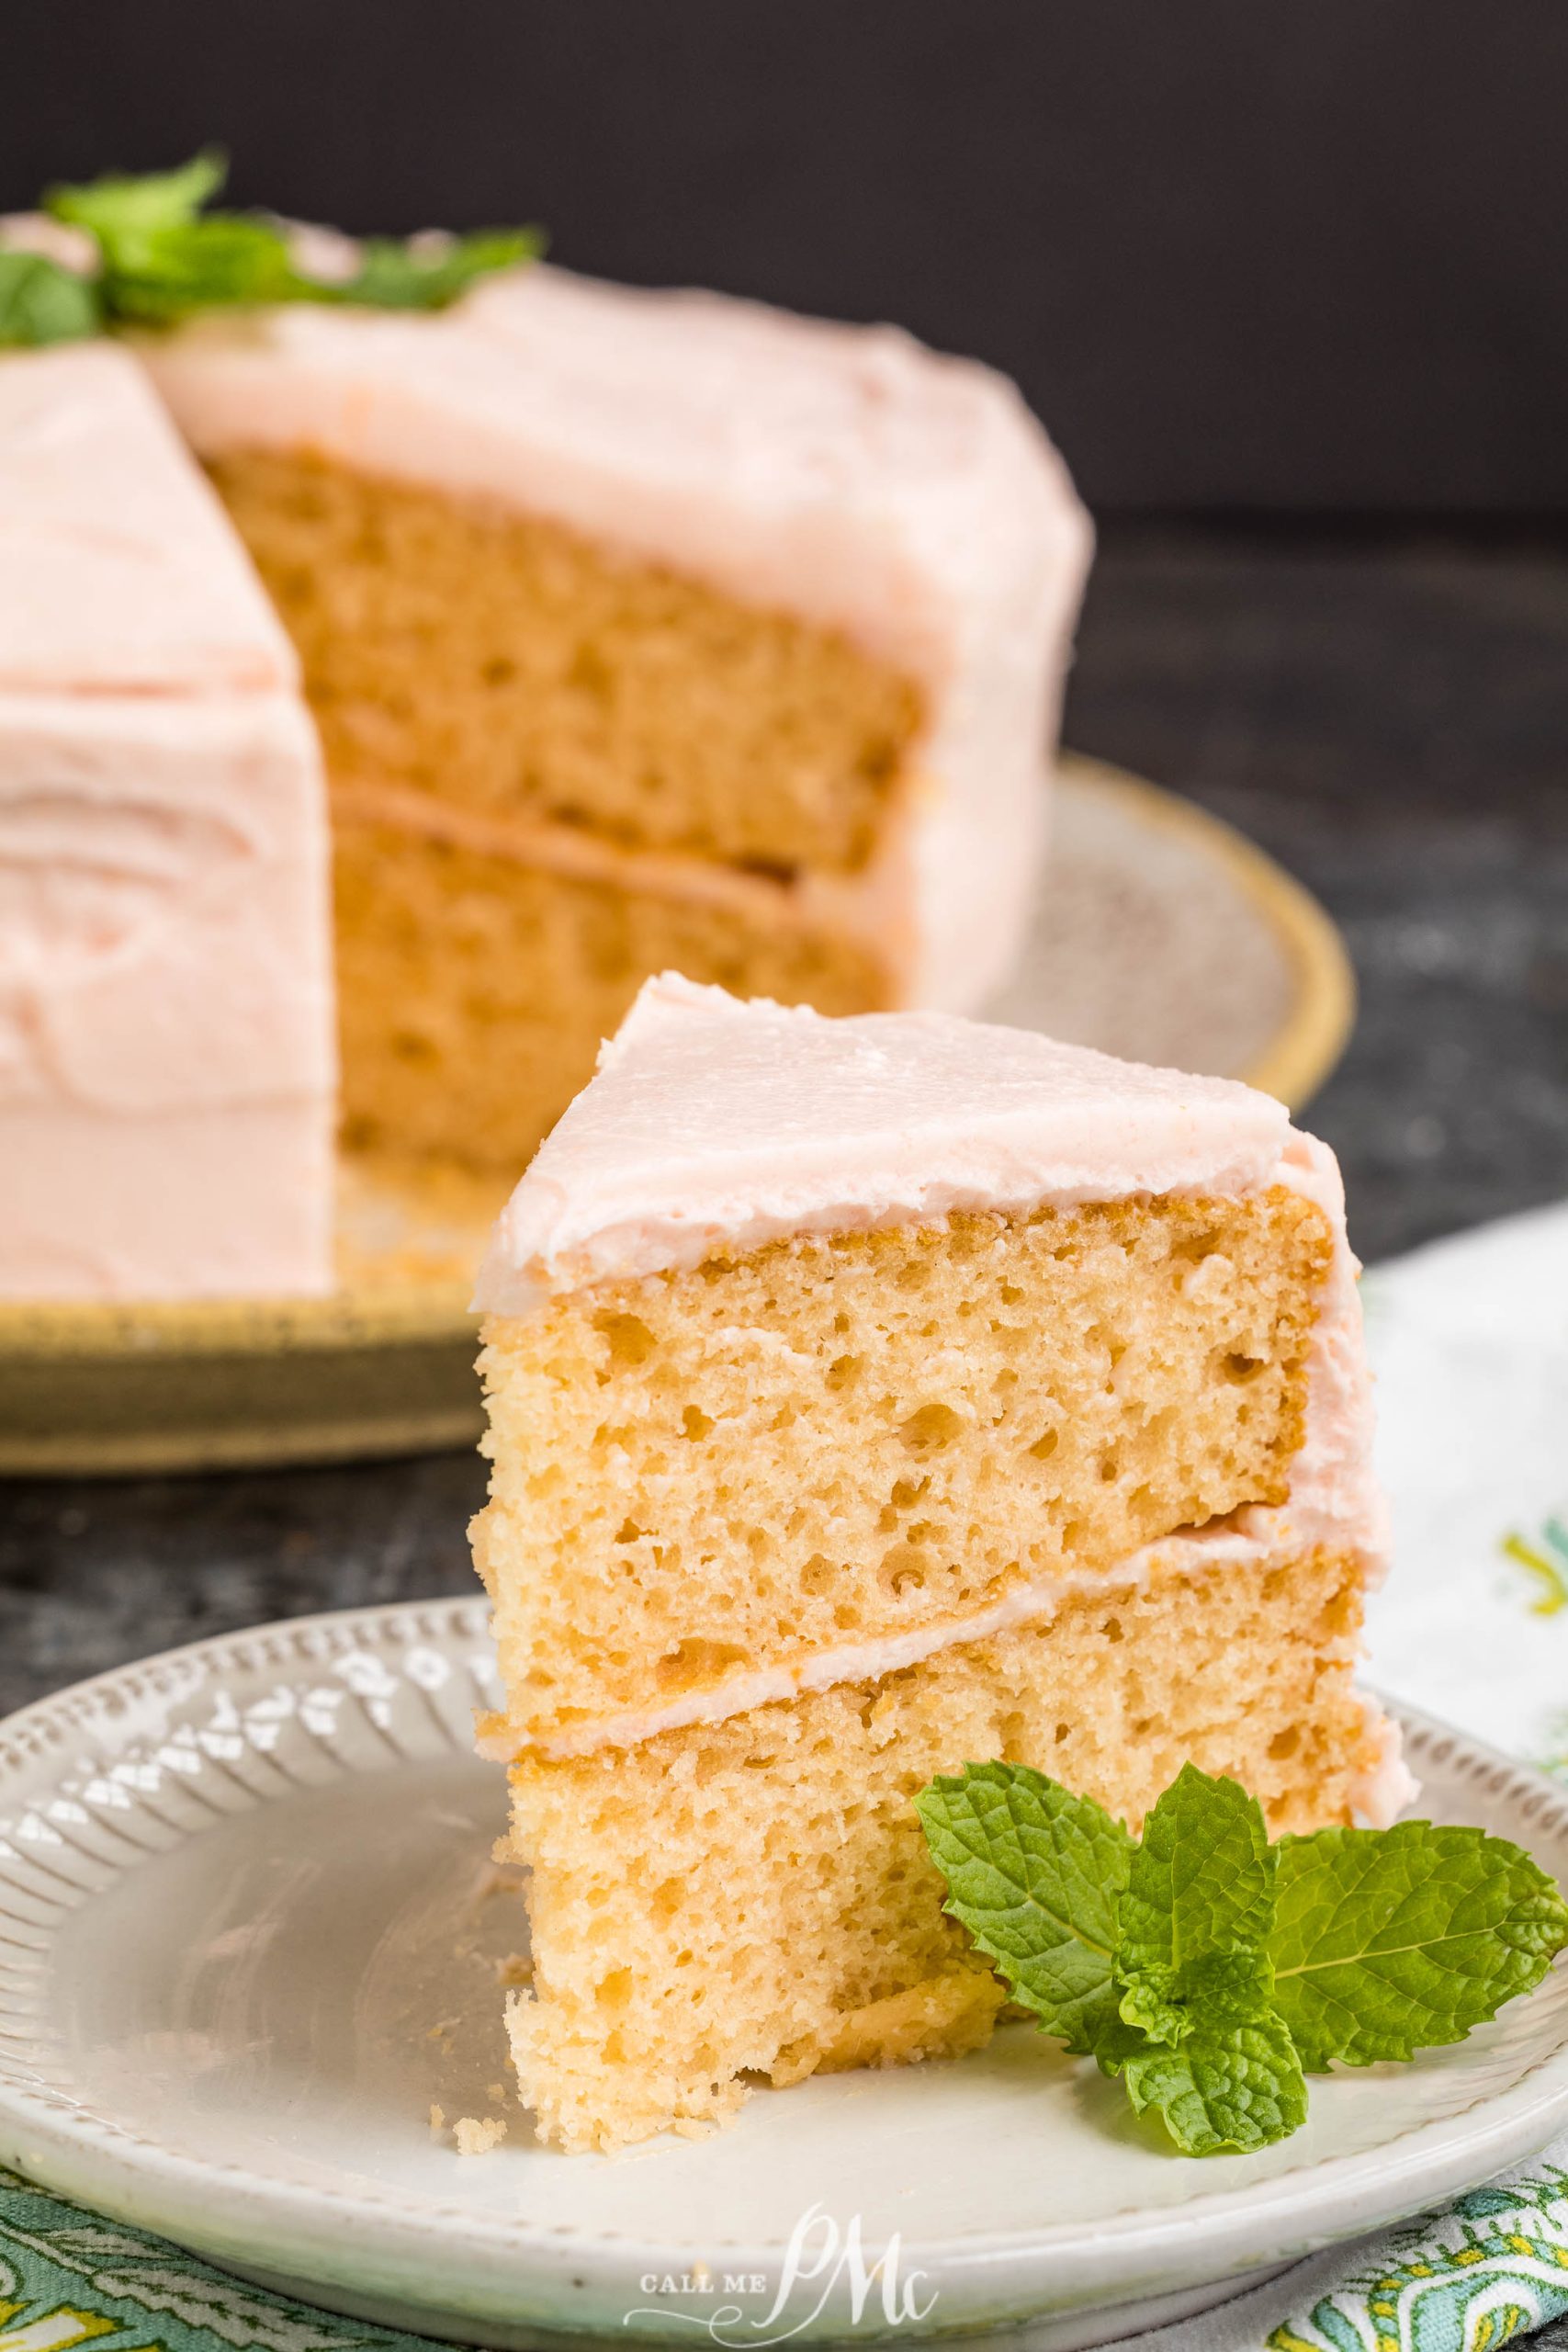
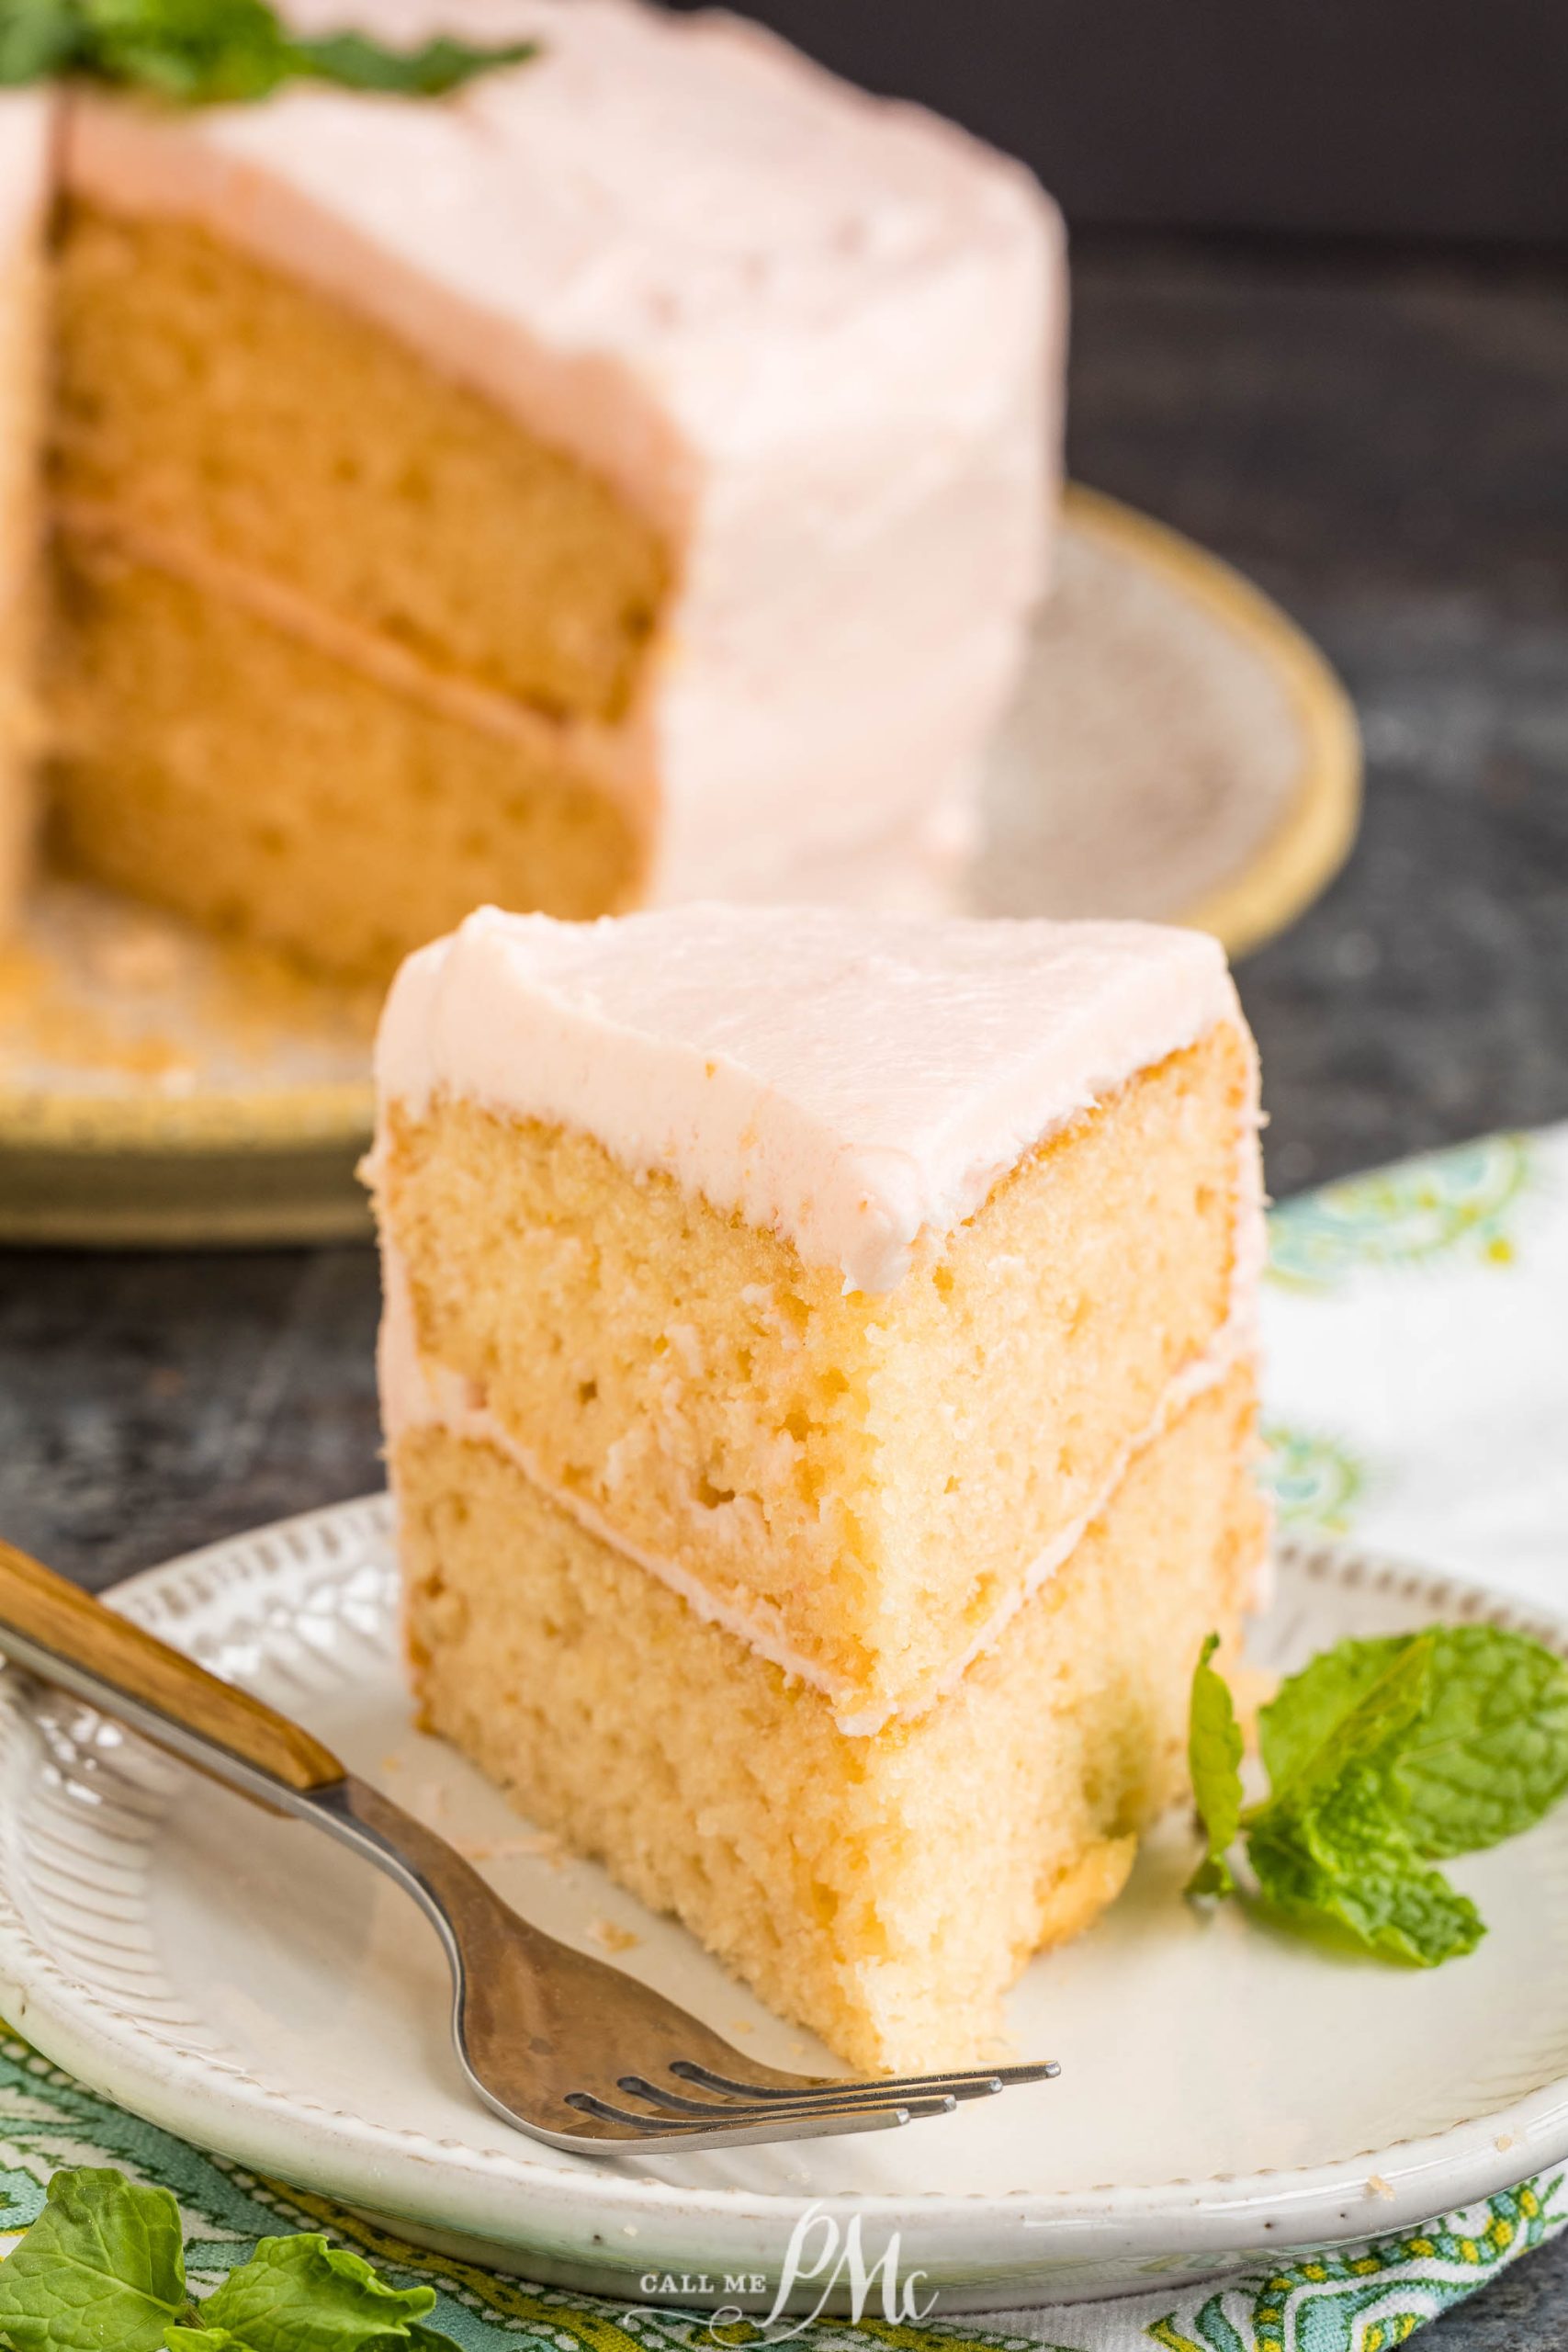
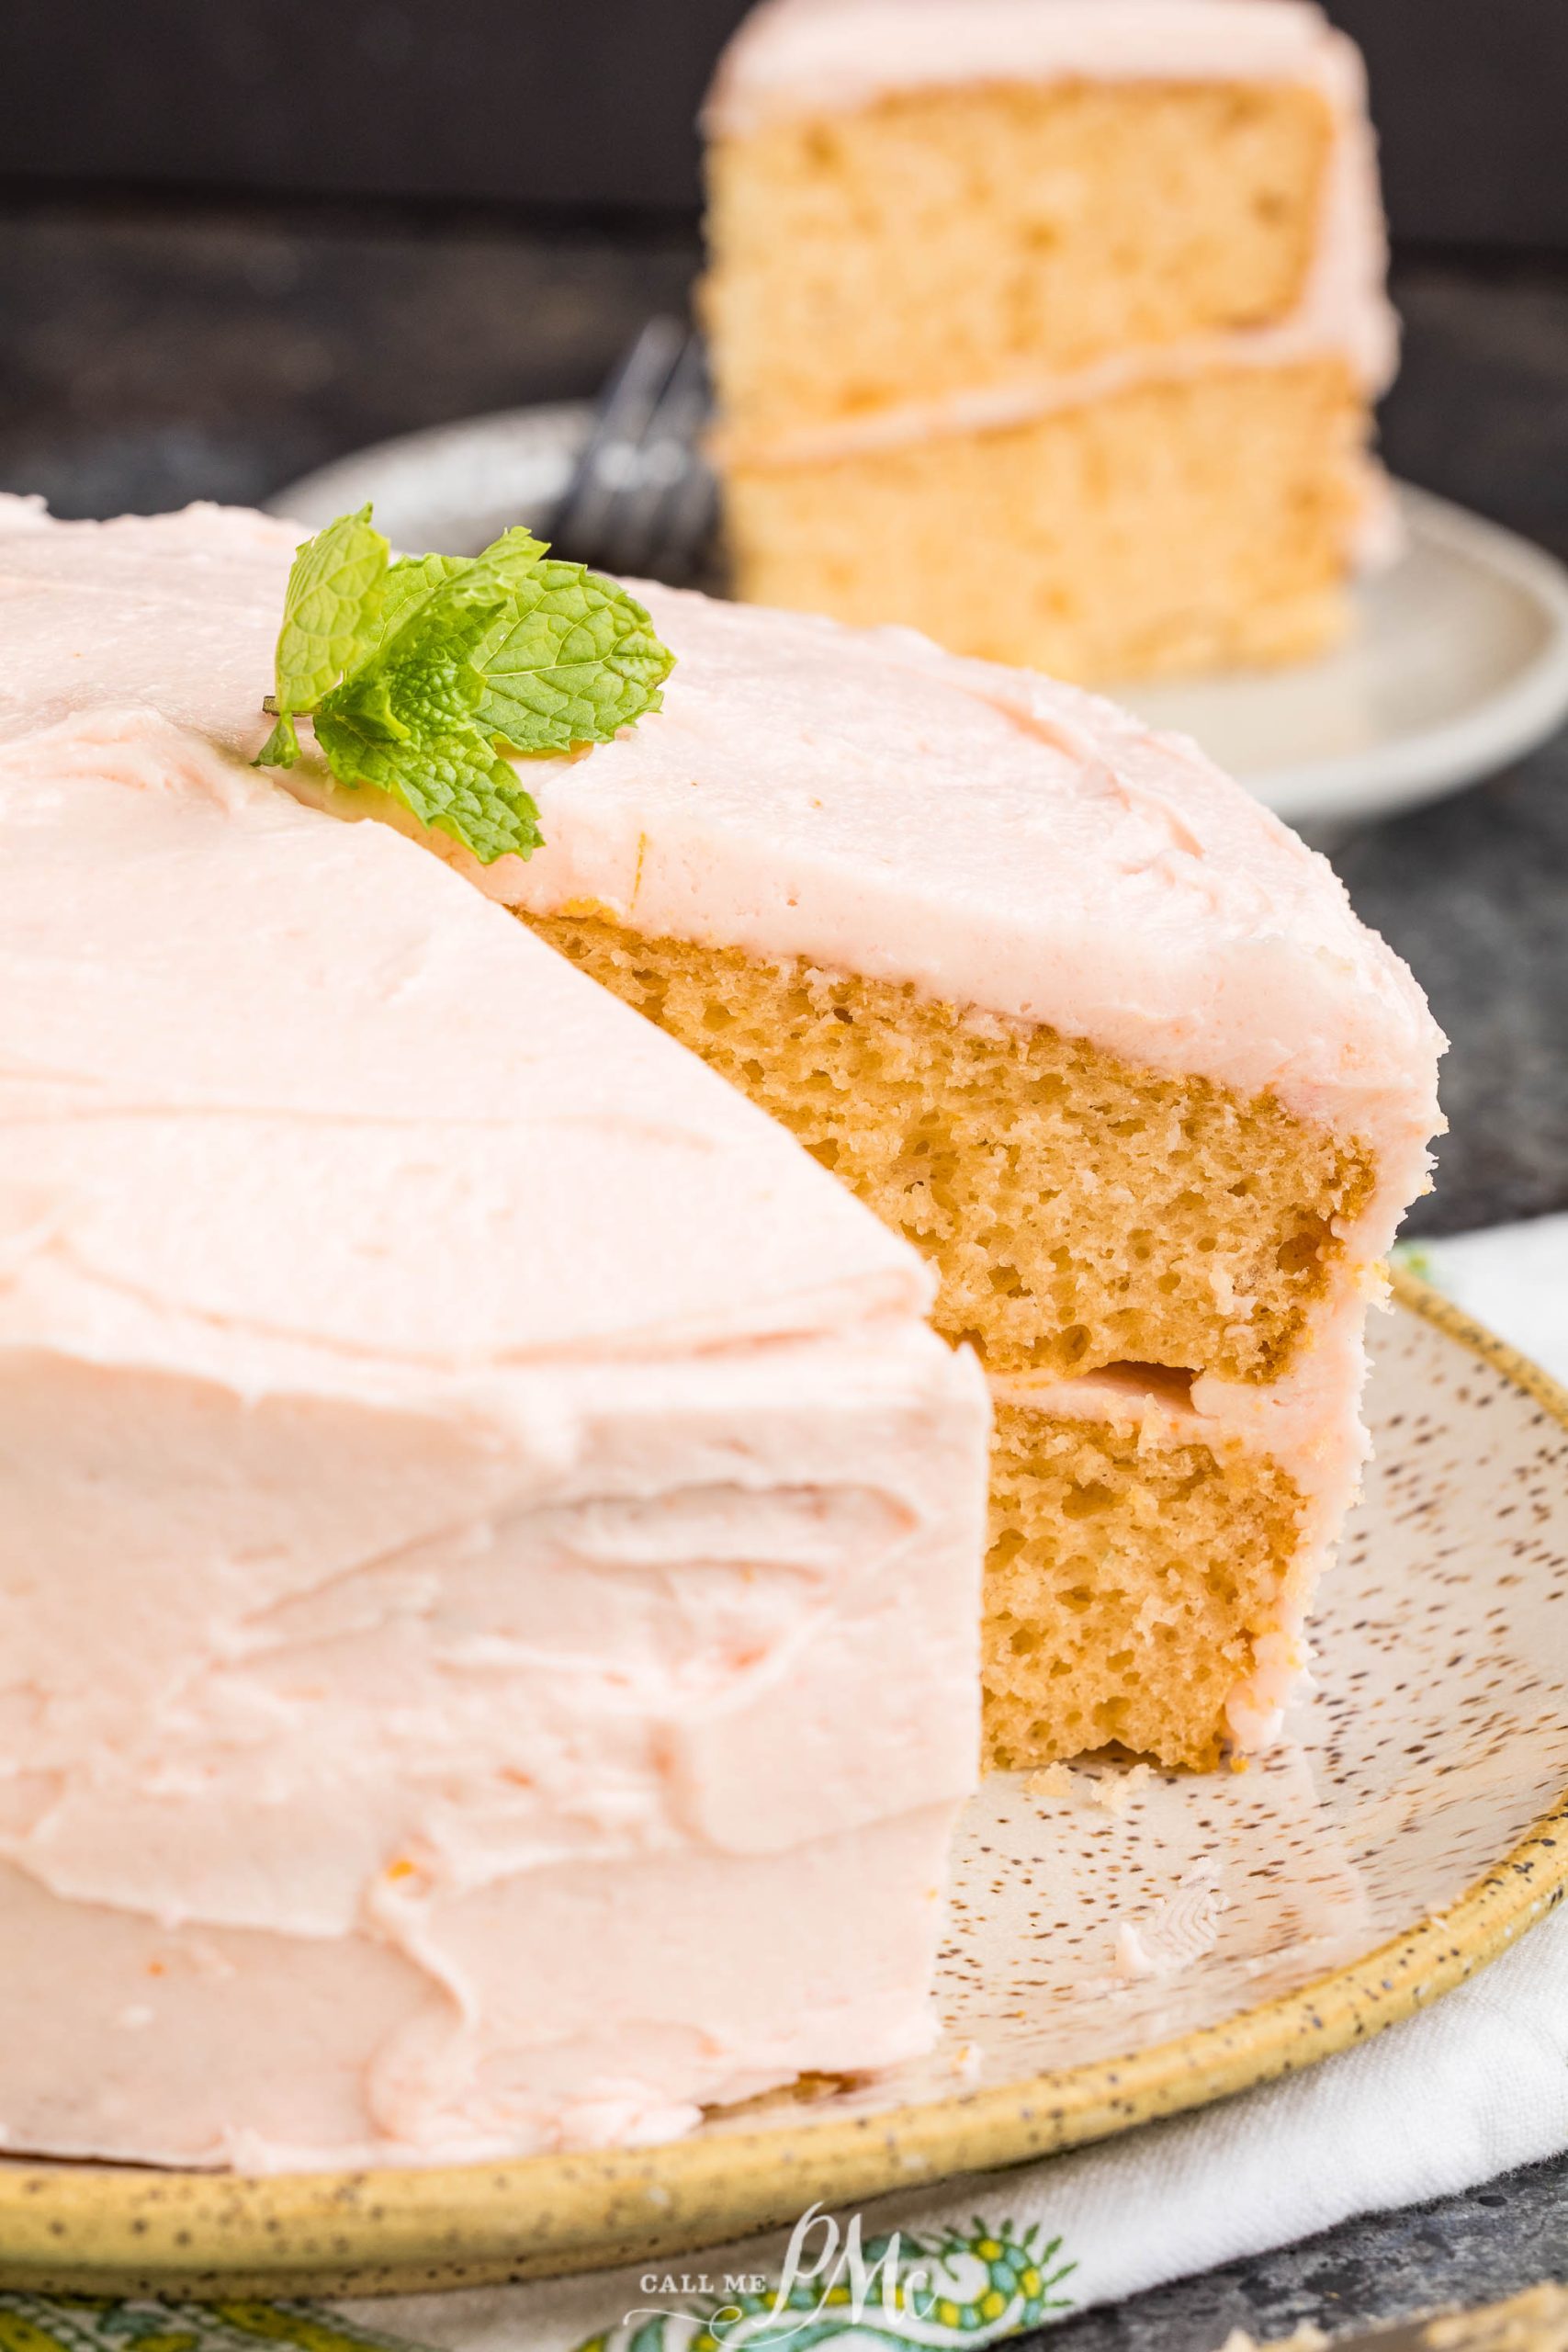
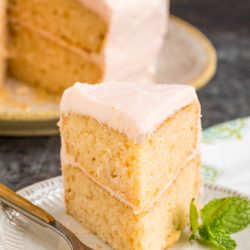
The Pink Champagne Layer Cake is light and soft, with a delicate flavor. The soft pink color makes it stand out on any dessert table and works well for showers, parties, and any celebration.
Key Takeaways
- The Pink Champagne Layer Cake features a light, soft texture and a delicate flavor, perfect for celebrations.
- Using dry champagne enhances flavor without making the cake too sweet; reduce it slightly before adding to the batter.
- Best practices include using room temperature dairy, avoiding overmixing, and chilling layers before frosting for easier stacking.
- Store the cake in the fridge for up to three days or freeze layers for one month; let thaw in the fridge before use.
- Add food coloring for a soft pink hue; use sprinkles or flowers as optional decorations for a fun touch.
Pink Champagne Layer Cake
This cake gets its flavor from pink Champagne, which adds a light sweetness and creates a soft texture. I suggest using a dry champagne so the cake doesn’t get too sweet. Reduce the champagne slightly before adding it to the batter to deepen the flavor. Bake until the center is set, and the edges pull away from the pan.
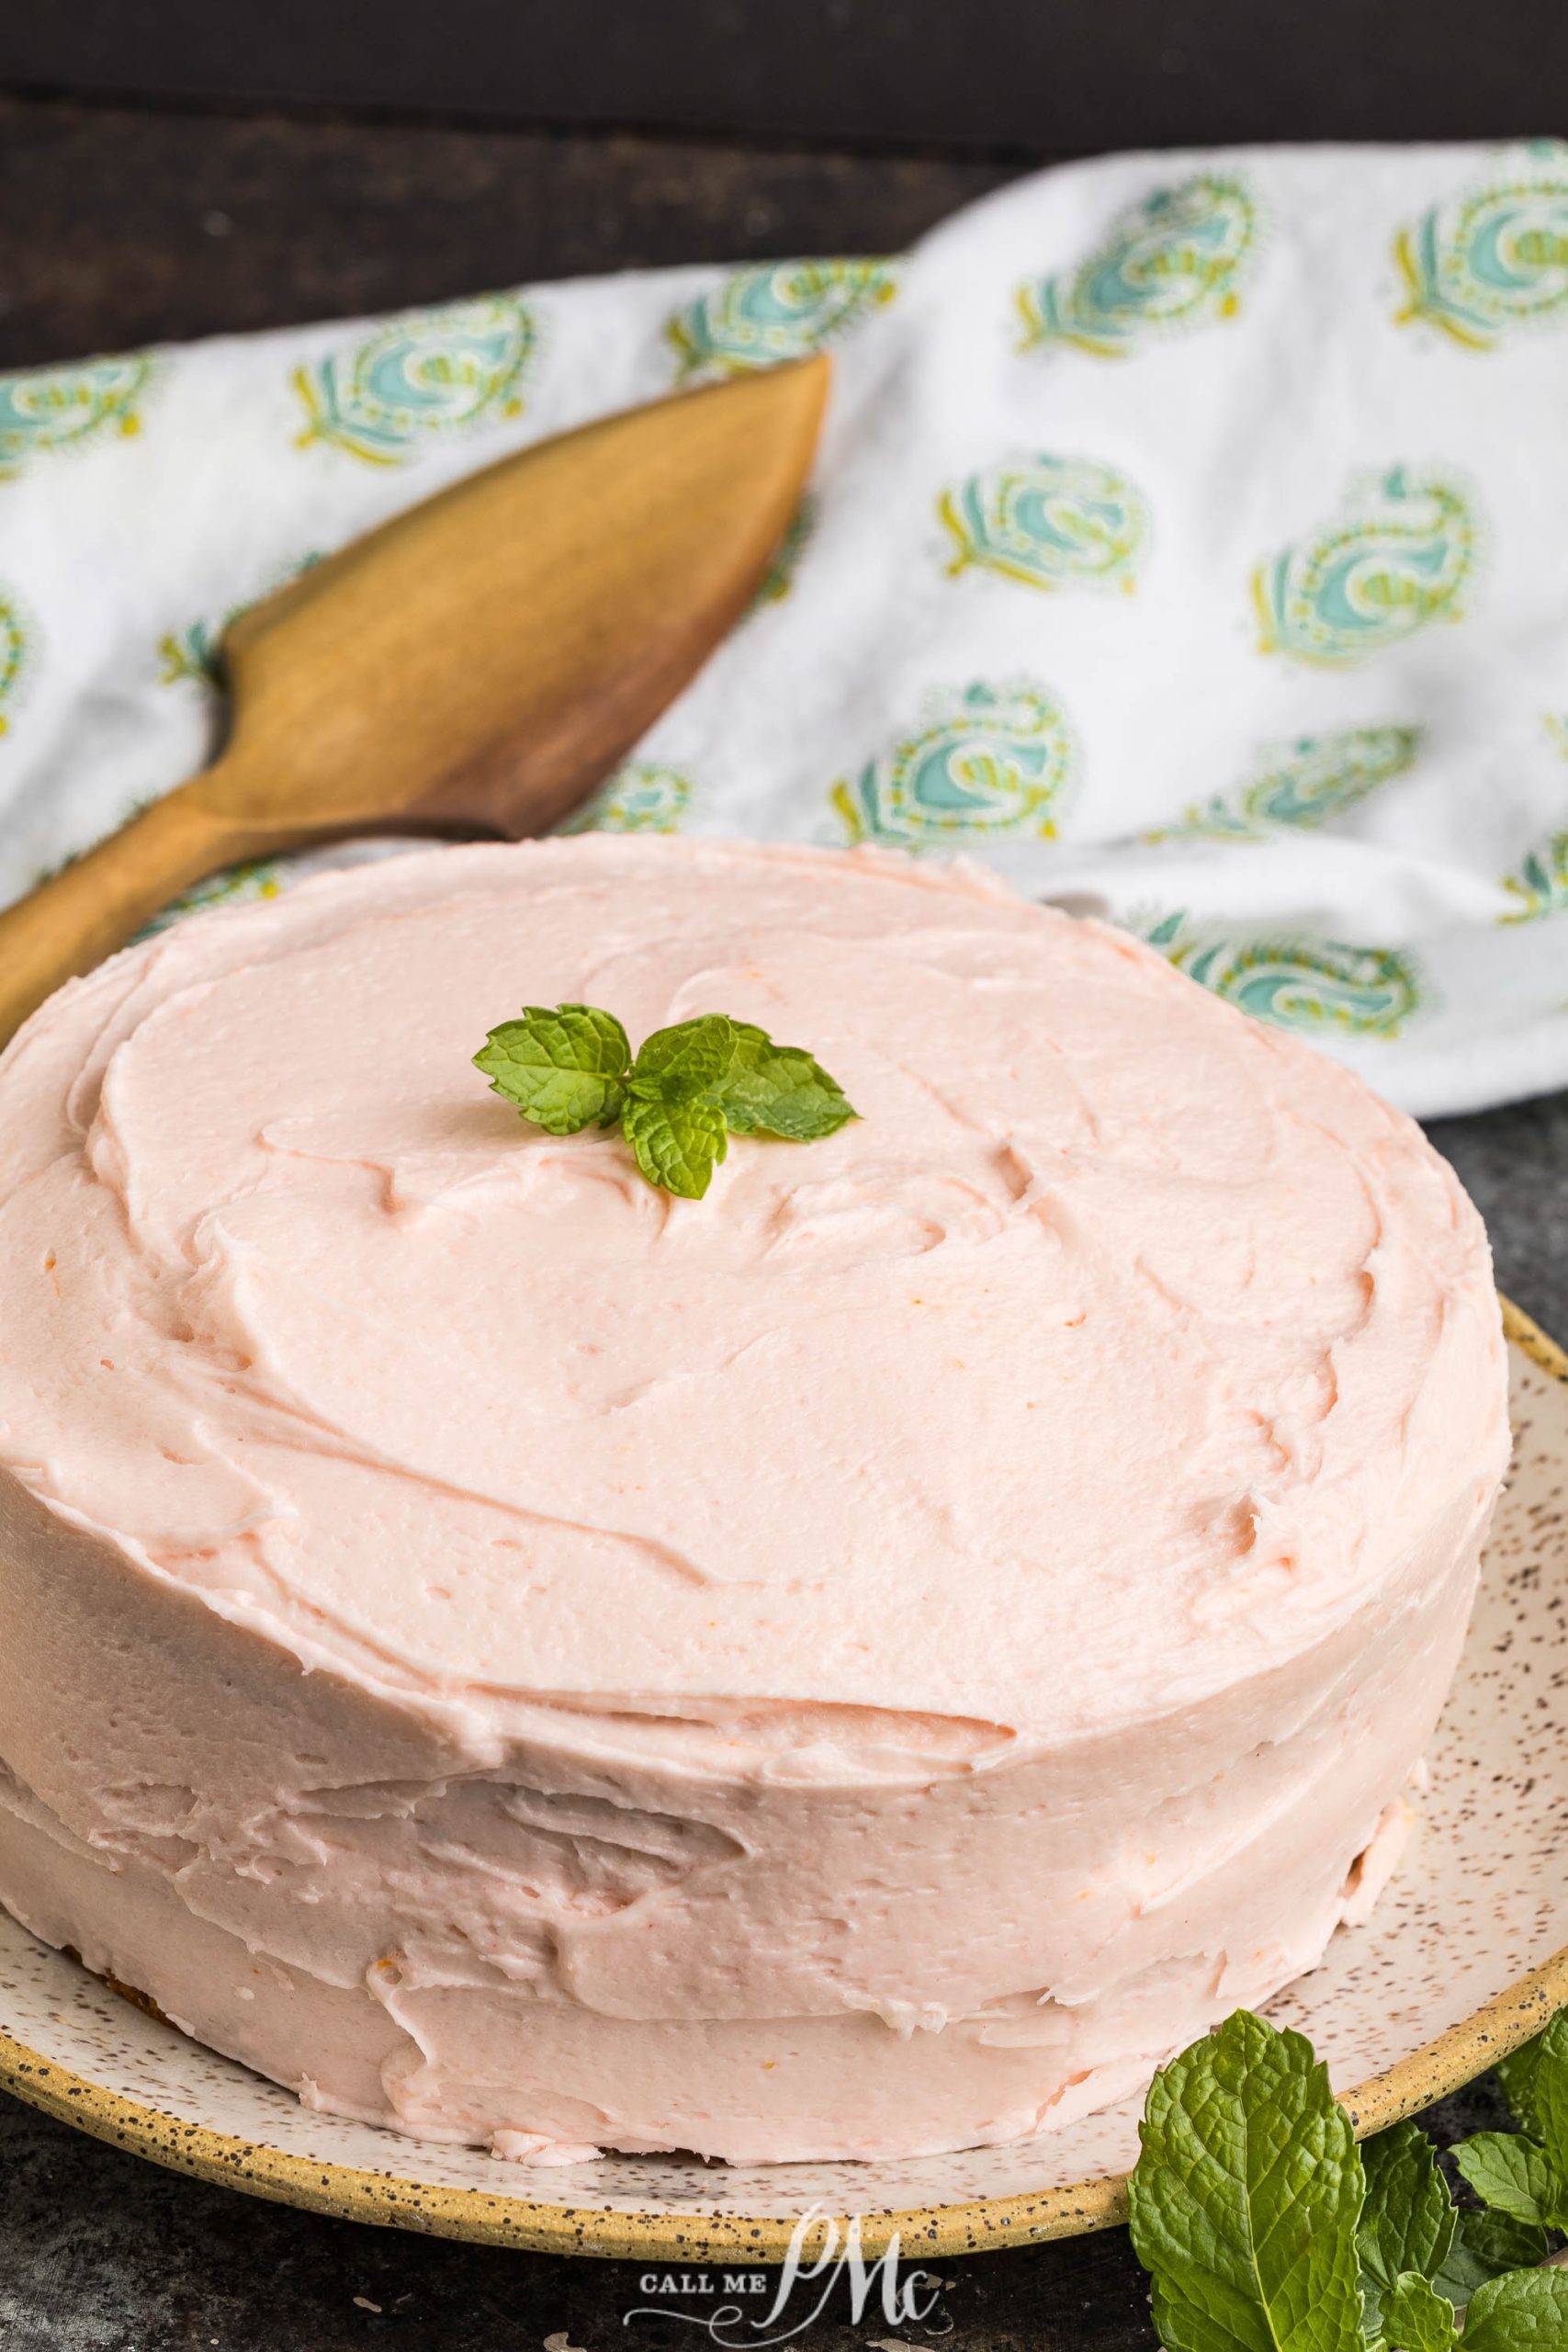
One reason we like this cake is how pretty it looks without much extra work. A small drop of pink coloring gives a clean, even shade.
Best tip for frosting: Bake the layers a day ahead and chill them before frosting. This helps keep the layers firm and easy to stack.
Why you’ll ❤️ this recipe.
🪶Light flavor
☁️Soft texture
🩷Pretty color
🎉Great for special events
🍰Works with different frostings
🎊Easy to decorate
Cooking tips and substitutions
Use room temperature dairy so the batter mixes smooth and even.
Do not overmix once the flour is added or the cake can turn dense.
If you do not want alcohol, use sparkling white grape juice for a similar texture and flavor.
A simple buttercream works well, but a light whipped frosting keeps it from feeling heavy.
Chill the cake before slicing for clean cuts.
Chocolate Layer Cake is another great celebration cake.
How to frost a layer cake
Tip #1: Begin by ensuring your cakes are level; if they’ve domed during baking, trim the tops with a serrated knife or a cake leveler. If they’ve caved, no need to level them; simply fill the cavity with frosting.
Place the first cake on a cake board or plate using a cake lifter, then place the plate on a cake turntable. Add approximately 1/2 cup of frosting. Use an angled spatula to spread it evenly.
Tip #2: Evenly measure the frosting for each layer. Spread the frosting evenly over each layer, pushing any excess towards the edges.
Continue stacking the layers, ensuring equal portions of frosting between them. If it’s the final layer, place it with the flat side up and add about 1/2 cup of frosting on top. Smooth it evenly, and then apply a thin crumb coat of frosting to the sides.
Chill the cake for at least 30 minutes to set the crumb coat. Afterward, spread another 1/2 cup of frosting on top and frost the sides with a thick coat. Use a cake knife to smooth the sides, and then apply the same technique to smooth the top.
Tip #3: For easier smoothing, frost the cake with a thick layer of frosting. Following these steps will give you a clean canvas for your cake decorating endeavors.
Tools you will need
- Rotating cake stand – this is the largest investment but it is worth it. I’ve used this stand for over 4 years.
- Offset spatula – this helps you spread your frosting and can also help smooth
- Cake leveler – to get even layered cakes. use to remove domed tops of your baked cakes
- Transfer tray – for easy transfer of sliced cakes
- Cake Knife – for smoothing frosting around a frosted cake
Pink Champagne Layer Cake FAQ
Keep it covered in the fridge for up to three days. Bring to room temperature before serving.
Yes. Wrap layers tightly and freeze for up to one month. Thaw in the fridge before using.
Two or three 8-inch round pans work well for even layers.
Add a small amount of food coloring and mix well before baking.
Food coloring
Essentially, pink Champagne doesn’t have enough color to tint a cake. Therefore, if you don’t add a little food coloring, the cake batter will stay a pale yellow (from the egg yolks). If you don’t like adding food coloring to recipes, you can leave it as is. However, if you want the pale pink that my cake is you’ll need to add a drop or two of gel or liquid food coloring. I like AmeriColor gel food coloring in either soft pink or pale peony. I didn’t add any coloring to the frosting.
Storing
Storing depends on what kind of frosting you use.
Sprinkles
Sprinkles are optional, but they add a fun touch to the cake. You can also garnish with flowers as I did for this Lemon Cake.
Pink Champagne Layer Cake Conclusion
This pink champagne cake brings a fun touch to any celebration. It looks special and tastes light without being too rich. With a few simple steps, it turns out soft, pretty, and ready for any party.
If you like this cake, you’ll enjoy these recipes as well.
- Frosted Pink Lemonade Bars
- PINK SALTY DOG
- SUGAR CHAMPAGNE GRAPES
- Champagne Grapefruit Mojito
- Perfect Pink Mojito Recipe
Pink Champagne Layer Cake
Items in blue & underlined below can be clicked for more detail or to purchase.
Equipment
Ingredients
For the cake
- 6 Tablespoons 85 g unsalted butter softened to room temperature
- 2 cups 400 g granulated sugar
- ⅔ cup 160 ml neutral cooking oil (canola, vegetable, or avocado)
- ¾ teaspoon vanilla extract
- 2 ¾ cups 345 g all-purpose flour
- 1 Tablespoon baking powder
- 1 teaspoon table salt
- ½ cup 118 ml buttermilk
- ½ cup 118 ml pink champagne
- 6 large egg whites room temperature preferred
- Pink food coloring (optional, see note)
For the pink champagne frosting
- 2 ¼ cups 532 ml pink champagne
- 1 ½ cups 339 g salted butter softened
- ¼ teaspoon vanilla extract
- 6 cups 750 g powdered sugar
Instructions
For the cake layers
- Preheat your oven to 350F (175C) and lightly grease and flour 3 8-inch round cake pans (tap out excess flour) and line the bottoms with parchment paper.
- In a large bowl (or the bowl of your stand mixer fitted with a paddle attachment), use an electric mixer to beat butter until creamy.6 Tablespoons (85 g) unsalted butter
- Add sugar, oil, and vanilla extract and stir well until creamy and well combined.2 cups (400 g) granulated sugar,⅔ cup (160 ml) neutral cooking oil,¾ teaspoon vanilla extract
- In a separate, medium-sized mixing bowl, whisk together flour, baking powder, and salt.2 ¾ cups (345 g) all-purpose flour,1 Tablespoon baking powder,1 teaspoon table salt
- Alternate adding flour and buttermilk: With mixer on low-speed, stir in a portion (about ½ cup/70g) of the flour mixture until just barely combined. Follow with half of the buttermilk. Repeat with another portion of flour and the remaining half of the buttermilk.½ cup (118 ml) buttermilk
- Alternate adding flour and pink champagne: With mixer still on low-speed, stir in another portion of flour until just combined. Stir in half the pink champagne, followed by another portion of flour, the remaining pink champagne, and then the remaining flour.½ cup (118 ml) pink champagne
- Food coloring: If you are using food coloring, add this here and gently stir in to combine. Set aside.Pink food coloring
- Whip the egg whites. Add the egg whites to a large, clean, dry, grease-free mixing bowl. Use an electric mixer (with clean, dry, grease-free beaters) to beat the egg whites on low speed until foamy, then gradually increase speed to high and continue to beat until you reach stiff peaks (opaque white, thick, voluminous, and hold their peak when the beater is lifted).6 large egg whites
- Fold egg whites into batter. Add the egg whites to the cake batter and use a spatula (NOT your electric mixer!) to gently fold the egg whites into batter until completely combined and well-distributed through the batter (batter should be uniform).
- Bake. Divide evenly into prepared cake pans (about 470 grams per pan) and transfer to center rack of 350F (175C) preheated oven and bake for 25-28 minutes or until a toothpick inserted in the center comes out clean or with a few moist crumbs.
- Cool. Allow cakes to cool in their pans for 10-15 minutes before carefully running a knife along the edge to loosen from the pan and then carefully inverting onto a cooling rack to cool completely. Allow cakes to cool completely before frosting (prepare your pink champagne reduction, below, while they cool).
Pink champagne reduction
- In a small skillet or saucepan, heat pink champagne over medium heat until it is simmering and reduced to 6 Tablespoons (this typically takes around 10 minutes, I just pour into a measuring cup to ensure it’s reduced properly (just above the ⅓ cup line/88ml), then pour it back to continue cooking if it’s not reduced enough).2 ¼ cups (532 ml) pink champagne
- Transfer reduced champagne to a heatproof bowl and allow to cool completely before proceeding (you can place the reduction in the refrigerator to cool faster).
Prepare the frosting
- Place butter in a large bowl and use an electric mixer to beat until smooth and creamy.1 ½ cups (339 g) salted butter
- Gradually add powdered sugar (about a cup/125g) at a time to the butter, stirring well after each addition. Be sure to scrape the sides and bottom of the bowl to ensure all ingredients are well mixed.6 cups (750 g) powdered sugar
- Stir in vanilla extract.¼ teaspoon vanilla extract
- Gradually, only a Tablespoon at a time, stir in the cooled, reduced champagne, stir until smooth and completely combined.
Assemble
- Once cakes are cooled completely, level the tops if necessary.
- Transfer first cake layer to a serving platter and spread an even layer of frosting over the cake. Repeat with remaining layers and apply an even layer of frosting around the cake. If desired, use extra frosting for decorative swirls on top (I used a small closed-star tip). Add sprinkles, if desired, and enjoy!