DIY Shoe Rack from Scrap Wood
This post may contain affiliate links that won’t change your price but will share some commission.
Learn how to make a DIY Shoe Rack from Scrap Wood in this simple tutorial!
If you’re looking for a simple storage solution for shoes for your busy family, you have come to the right place!

DIY Shoe Rack from Scrap Wood
Why am I showing you a shoe rack? This is a Big Daddy DIY craft project!
I have neglected to photograph other projects he’s done since I started blogging. It just didn’t occur to me until after he put the water fountain in the backyard, and after he made the coat/backpack rack (shown below).
I’m a quick thinker like that! But, this time, yes, this time I grabbed my camera before he finished the statement, “I’m thinking about making…..”
Supplies for This Scrap Wood Project
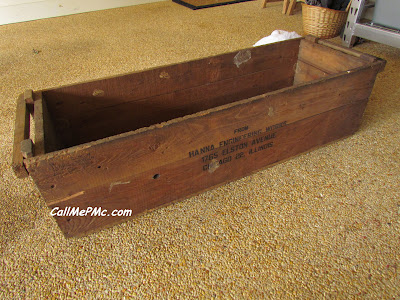
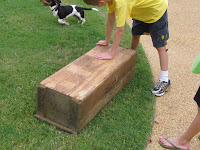
I started with a machine shipping box that we found near our home. It came from an old machine manufacturing warehouse in Chicago.
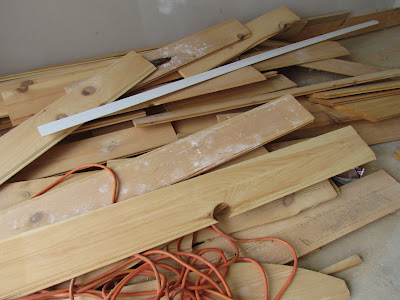
- 6-inch scrap pine bead boards – I picked through and found undamaged boards.
- Dishing Washing Liquid
- Scrub Brush – I used Dawn detergent and a brush to clean the grime off the box.

The scrap boards were scrap pieces from a friends’ building project. The box was exactly 12 inches wide (inside to inside).
I cut the bead board length to fit tightly in the box, from side to side.
The coat rack/backpack project mentioned earlier is shown below. It is another reclaimed project using the scrap bead boards and old doorknobs.
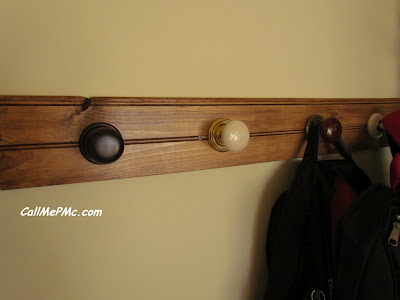
It provides a place for coats and backpacks to “hang around” Ha Ha.
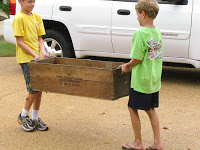
I had great help from the boys and Summer.
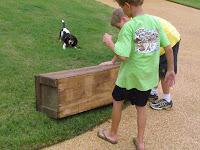
I wish this was in video so you could hear them grumble, complain, and argue with each other every step of the way!
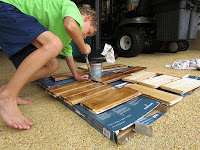
Get the littles to help!
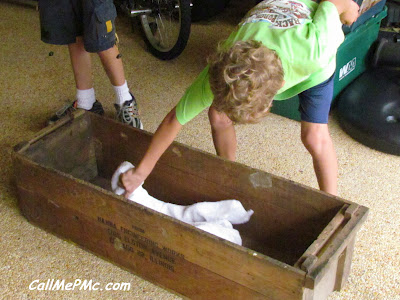
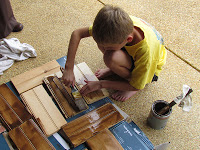
Lincoln wiping the dust and grime out.
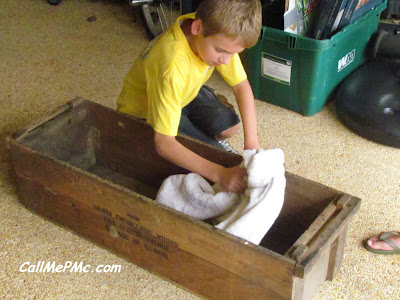
And, Ryder did not want to miss out on the photo op, so he did a little ‘cleaning’.
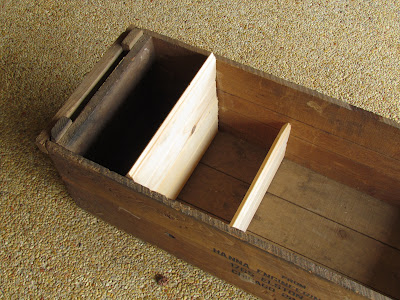
I pre-fit the cut shelves before nailing them to the sides of the box. The scrap wood pieces fit together perfectly to make a rigid shelf.
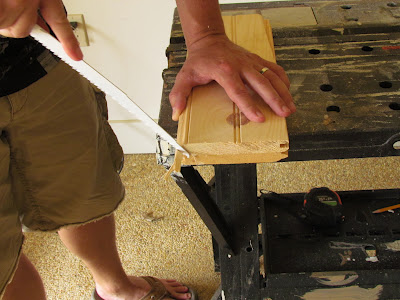
I really needed a miter saw, but had to get by with a circular saw. I used a handheld saw to clean up my cut.
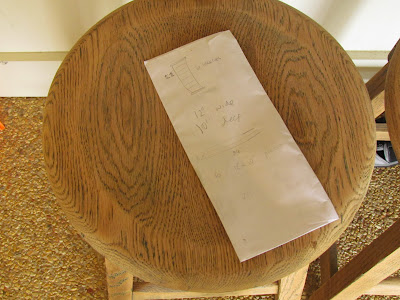
All weekend DIYers must have a set of plans, right? Well, here are mine, on the back of an envelope, that I sketched out during breakfast.
Finishing My Scrap Wood Shoe Rack
It all comes together!
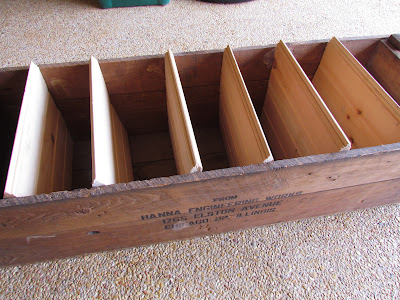
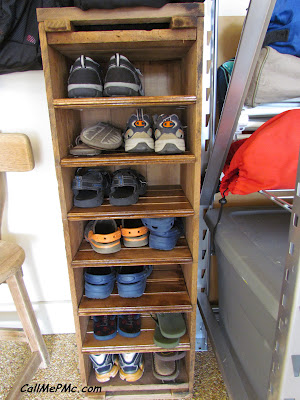
I concluded from shoe racks at the home store, that you need about six inches for each pair of shoes. I divided the length of my box by six to determine that I could get 7 shelves in my box.
The boys were great at helping me stain the shelves before permanently attaching them inside the box. I used a walnut stain with polyurethane already mixed in. I found it closely matched the existing patina of the wood box.
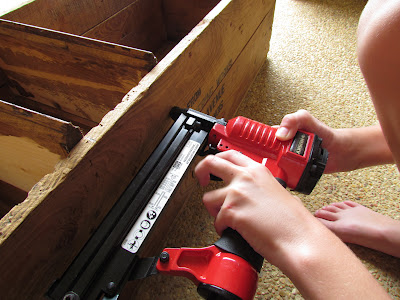
Use a pneumatic nailer with small nails to attach the shelves at 6″ intervals.
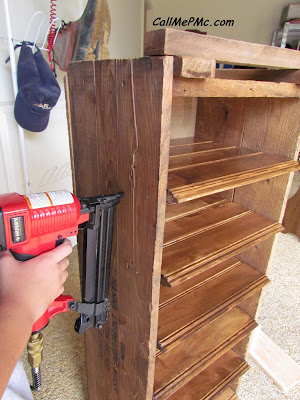
Oh yea, it is really coming together, this is exactly what I envisioned over breakfast.
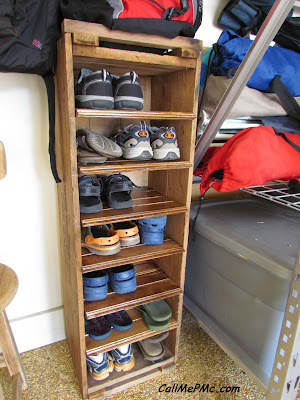
Yippee! Organized shoes! Now if we can just get the boys to put their shoes in here!
You may also like this easy Wine Cork Craft. The Office is one of the largest projects we’ve tackled. To see all my easy craft and DIY projects go here.
I mainly post recipes. You can see them all here.
As an Amazon Associate, I earn from qualifying purchases. This post contains affiliate links. If you click the link and make a purchase I will receive a small commission at no cost to you. Visit all my recommended products at Paula’s Picks on Amazon. Read my entire Privacy Policy here.
I love this DIY shoe rack idea! Using scrap wood not only saves money but also adds a personal touch to home decor. The step-by-step instructions are super easy to follow. Can’t wait to try this myself and finally organize my shoes! Thanks for sharing!
Love this idea! I’ve been looking for a creative way to store my shoes and this DIY shoe rack is perfect. Using scrap wood is a great way to reduce waste and make the project even more sustainable. Can’t wait to try it out!
This is a great idea. I have an old shoe rack which I want to recycled and is black in color…so you gave me an Inspiration to liven up my rack… thank you.
oh, I’m so happy you like it! I’ll say it was all my husband’s doing, but it turned out great!
What a great idea! I am on the lookout for a shoe rack to put by our front door. Maybe if I don't find the right one we can adjust something to make a right one.
Thanks for linking up to Friday Fascinations! You have been featured, come over and get a button! http://domesticrandomness.blogspot.com/2012/09/friday-fascinations-4-and-5-feature.html
Wonderful and thrifty idea!! Thanks so much for linking up to Tasty Thursdays on The Mandatory Mooch!! I hope you will link up again. The party will be live tonight. http://www.mandatorymooch.blogspot.com
Thanks, Nichi
What a great project! I need something like this. Thanks for sharing at All my Bloggy Friends last week. I can't wait to see what you share tomorrow! 🙂